
短信接口这种东西,在现在的环境下基本 web 应用都会去准备的,毕竟移动端还是占据不少市场的,方便快捷与可控都是比起用户名密码方便很多。在对比多个短信提供商后,我最终选择了 submail,主要是有以下几点原因:
-
接口的灵活性,提供多种类型接口 ,包括单/多条内容自定义短信,单/多条模板变量短信,模板控制接口,短信日志接口,余额接口。这些接口包含了所有场景,而对比阿里大鱼、腾讯云,每次都要申请还要上传一堆东西(什么域名证书啊,还必须一致),时间两小时内,然而 submail 不需要上传任何东西,写好后直接发起审核,并且白天几分钟就通过,刚才是晚上十二点,我发起审核,半小时不到就通过了,速度太赞。
-
后台真的好看,比起阿里大鱼、腾讯云、106这些,真的好看了不是一点,提供了可视化图表,余额提醒这些,最赞提供了非常详细的错误日志,方便排错,
-
价格优惠,短信分为事务类和运营类,一般应用事务类就足够了。第一次体验 35 元就有 1K 条,后面购买 400 元 1W 条,比阿里大鱼,腾讯云便宜 50 元。
-
操作十分简单,请求接口就完事儿(好像都是这样,,逃~)
这篇文章能够带给你什么
-
submail 的使用
-
使用
httpclient+fastjson工具发送一条信息 -
使用
httpclient+fastjson工具发送多条信息 -
在 spring-boot 中集成 submail
submail 的使用
一个网站的使用是非常简单的,无非就是官网 submail 注册登录控制台,所以我直接从控制台这里开始,我姑且假设你已经购买了优惠包已经拥有了 1K 条的短信量。
接口说明
在开始之前,我们需要了解一下 submail 的短信接口
-
message/send 接口,优点:方便、快速对接使用,免模板,可直接提交任意内容(需要符合短信发送规范,短信签名前置),缺点:并发效率不高,适用于并发小,内容变动或模板变动较多的场景(并发效率低指高于每秒1000的并发,低于这个并发需求请无视)
-
message/xsend 接口,优点:高稳定性,低延迟,高并发,适用验证码类要求低延迟,高请求效率的场景,缺点:接入时需要提前创建模板,并指定模板ID
-
message/multisend 接口,优点:接入方便,免模板,可直接提交任意内容(需要符合短信发送规范,短信签名前置),支持大批量群发,缺点:效率低于multixsend,如果每小时的发送量低于百万级,请无视此缺点
-
message/multixsend 接口,优点:高效,高稳定性,低延迟,超高并发,适用大批量群发场景(50个号码/API,100线程并发,每分钟可处理15万左右的群发需求)缺点:接入时需要提前创建模板,并指定模板ID
-
message/template 接口,可以获取、创建、编辑或删除您的短信模板。
-
log/message 接口, 可以方便的查询详细的短信发送日志和状态记录,也还可以按短信模板、手机号码、发送状态、开始/结束日期等条件筛选日志的返回结果。
-
balance/sms 接口,可以实时获取账户的短信余额。
创建模板
我们选择使用 2 和 4
的接口,因为它具有高稳定性和高并发的特点。使用这两个接口的前提是我们需要创建短信模板
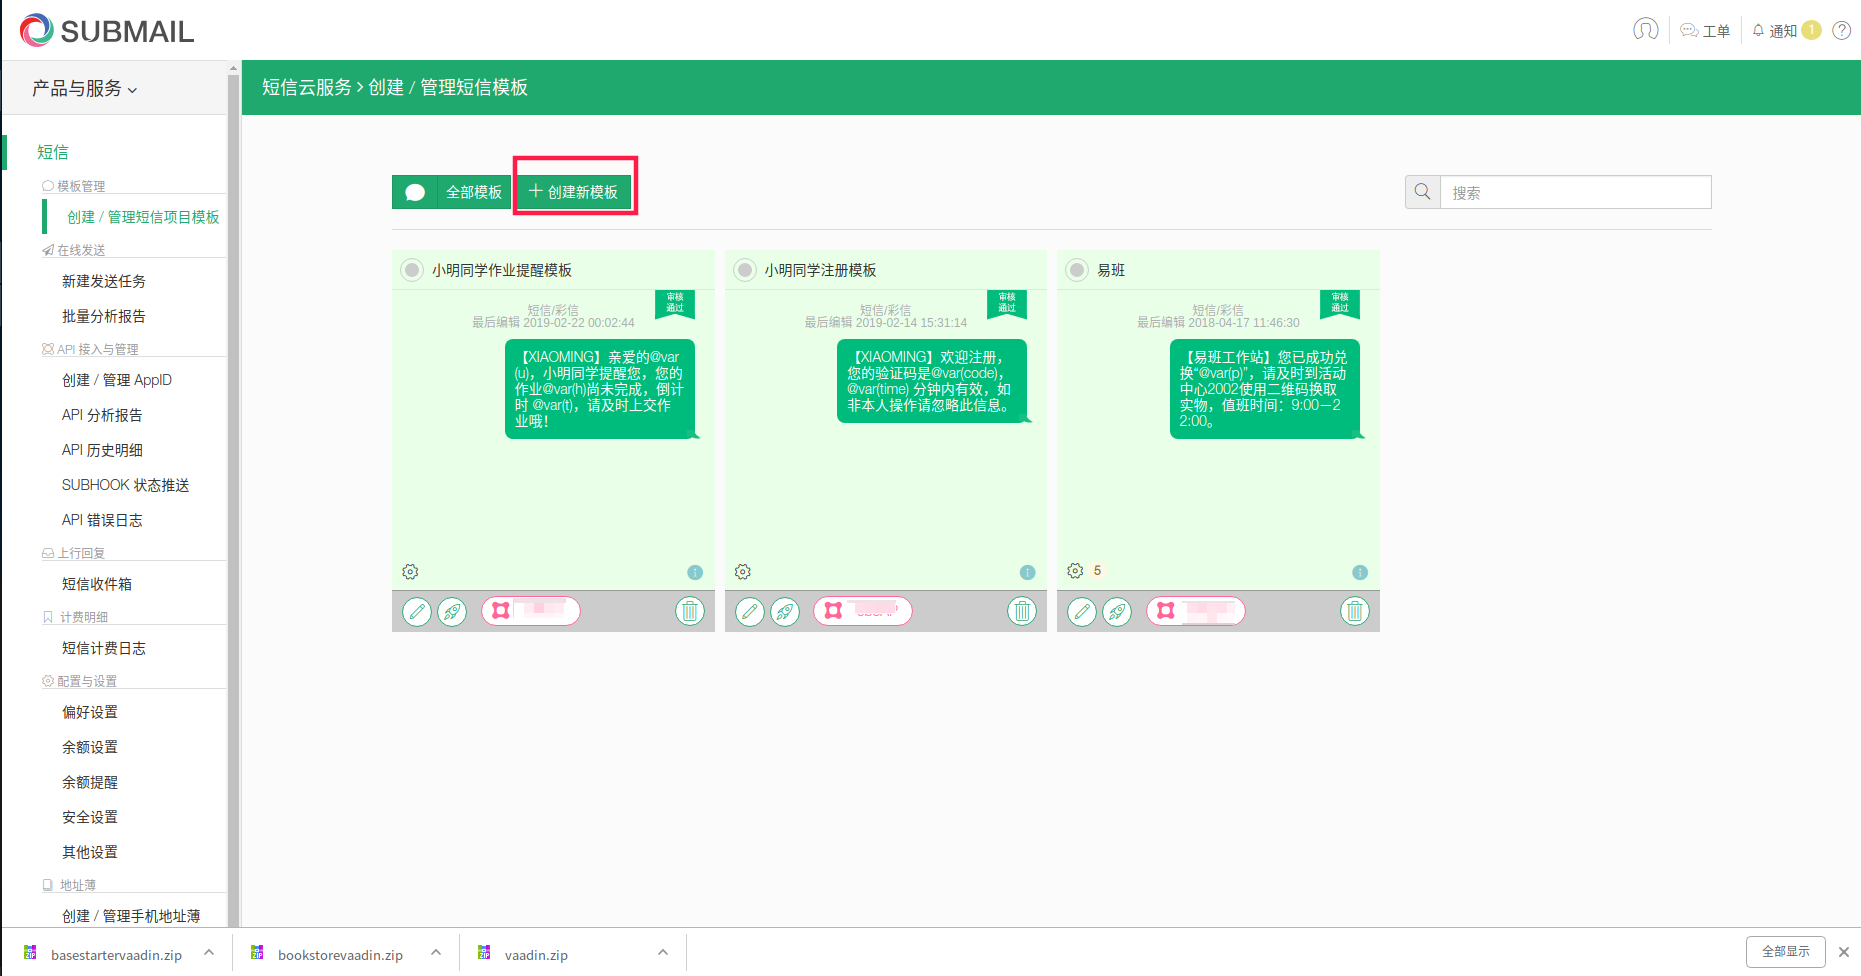
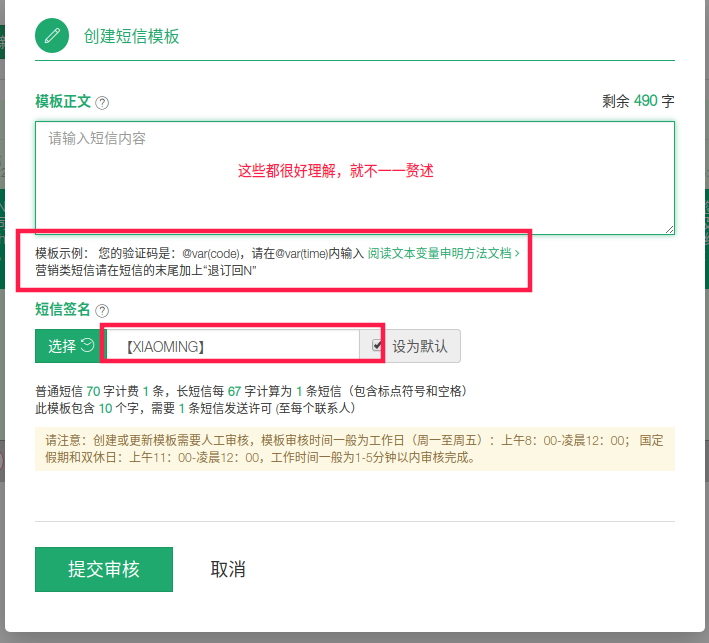
创建完成耐心等待审核即可
创建 APPID
在有了模板后,我们需要创建一个 APPID,简单的说就是密钥,用来进行认证短信发送的。
image::https://resources.echocow.cn/file/2019/2/22/%E6%B7%B1%E5%BA%A6%E6%88%AA%E5%9B%BE_%E9%80%89%E6%8B%A9%E5%8C%BA%E5%9F%9F_20190222010204.png[创建 APPID]
测试短信
完成上面两步就可以测试短信了
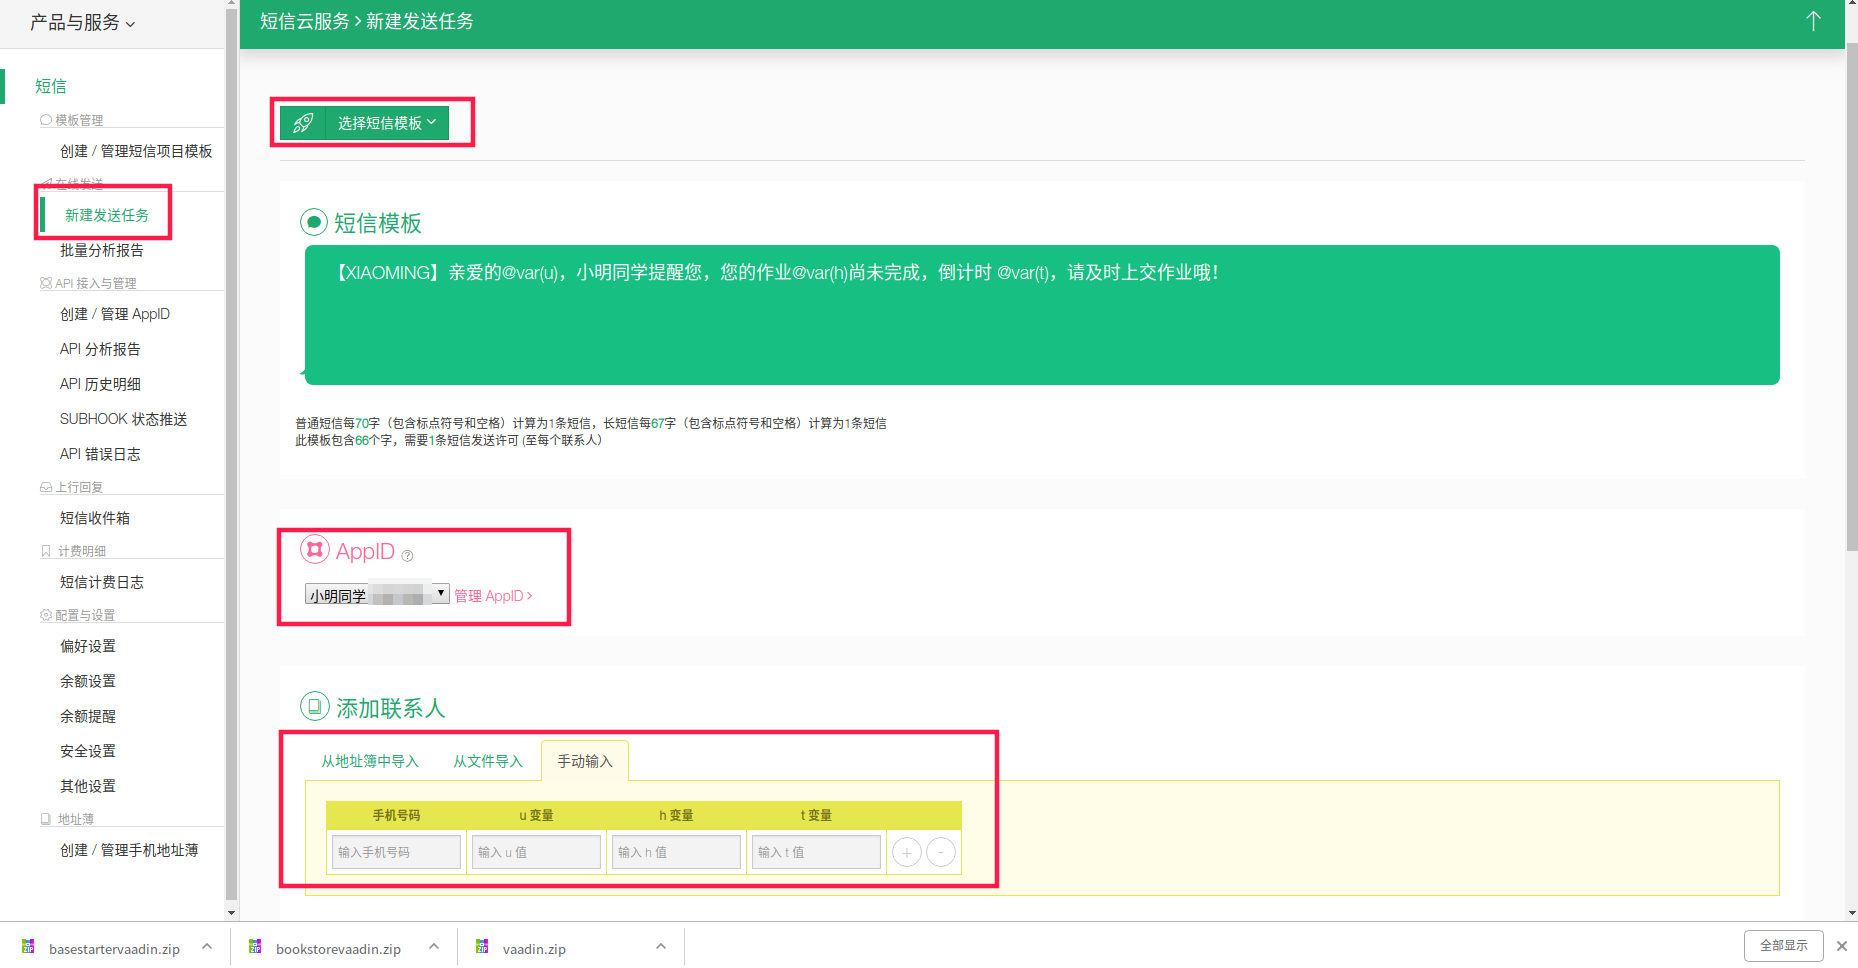
然后点击最下面的发送即可,这就是 submail 的使用方式,所测的更多功能需要大家自己多多探索,非常简单。
发送一条信息
使用 maven 或者 gradle 引入依赖 fastjson 和 httpclient
 'fastjson' : 'com.alibaba:fastjson:1.2.56',
`'httpClient' : 'org.apache.httpcomponents:httpclient:4.5.7'
我们采用 明文的密匙验证模式,因为他简单,具体参见 https://www.mysubmail.com/chs/documents/developer/gbibb3
创建测试用例,具体请看注释
    @Test
    public void messageOneTest() throws Exception {
        CloseableHttpClient httpclient = HttpClients.createDefault();
        // api 地址
        String url = "https://api.mysubmail.com/message/xsend";
        // 需要使用 POST 请求
        HttpPost httpPost = new HttpPost(url);
        JSONObject jsonParam = new JSONObject();
        // 创建的 APPID
        jsonParam.put("appid", "");
        // 创建的 APPID 的 APPKEY
        jsonParam.put("signature", "ae54fe1399bafd5728e88ca29a7e22f8");
        // 你的模板编号,见 https://www.mysubmail.com/chs/documents/developer/MmSw12
        jsonParam.put("project", "");
        // 接收人手机号
        jsonParam.put("to", "");
        JSONObject vars = new JSONObject();
        // 模板变量
        vars.put("code", "1234");
        vars.put("time", "30");
        jsonParam.put("vars", vars.toJSONString());
        StringEntity entity = new StringEntity(jsonParam.toJSONString(), "UTF-8");
        entity.setContentEncoding("UTF-8");
        entity.setContentType("application/json");
        httpPost.setEntity(entity);
        // 响应体
        HttpResponse resp = httpclient.execute(httpPost);
        String respContent = null;
        if (resp.getStatusLine().getStatusCode() == 200) {
            HttpEntity he = resp.getEntity();
            respContent = EntityUtils.toString(he, "UTF-8");
        }
        System.out.println(respContent);
    }
发送多条信息
使用 maven 或者 gradle 引入依赖 fastjson 和 httpclient
 'fastjson' : 'com.alibaba:fastjson:1.2.56',
`'httpClient' : 'org.apache.httpcomponents:httpclient:4.5.7'
创建测试用例,重复地方不再加注释啦
    @Test
    public void messageManyTest() throws Exception {
        CloseableHttpClient httpclient = HttpClients.createDefault();
        String url = "https://api.mysubmail.com/message/multixsend";
        HttpPost httpPost = new HttpPost(url);
        JSONObject jsonParam = new JSONObject();
        jsonParam.put("appid", "");
        jsonParam.put("signature", "");
        jsonParam.put("project", "");

        // 模板变量
        JSONObject vars = new JSONObject();
        vars.put("code", "");
        vars.put("time", "");

        // 第一个接受者
        JSONObject person1 = new JSONObject();
        person1.put("to", "");
        // 此人的模板变量,因为我做测试,所以所有的人都用同一个变量即可
        person1.put("vars", vars);

        // 第二个接受者
        JSONObject person2 = new JSONObject();
        person2.put("to", "");
        // 此人的模板变量,因为我做测试,所以所有的人都用同一个变量即可
        person2.put("vars", vars);

        // 接受者数组
        JSONArray multi = new JSONArray();
        multi.add(person1);
        multi.add(person2);

        jsonParam.put("multi", multi.toJSONString());

        // 答应出来瞅瞅
        System.out.println(jsonParam.toString());

        StringEntity entity = new StringEntity(jsonParam.toJSONString(), "UTF-8");
        entity.setContentEncoding("UTF-8");
        entity.setContentType("application/json");
        httpPost.setEntity(entity);
        HttpResponse resp = httpclient.execute(httpPost);
        String respContent = null;
        if (resp.getStatusLine().getStatusCode() == 200) {
            HttpEntity he = resp.getEntity();
            respContent = EntityUtils.toString(he, "UTF-8");
        }
        System.out.println(respContent);
    }
如果响应报错,请参照 https://www.mysubmail.com/chs/documents/developer/c8ujr 文档拍错
在 spring-boot 中集成 submail
对于在 spring boot 中,我们有几个要求 1. 把他作为一个组件来使用 2. 批量发送时,需要异步不阻塞 2. 使用配置文件进行配置 APPID 等信息
添加配置文件读取类
/**
 * @author Echo
 * @version 1.0
 * @date 2019-02-22 01:26
 */
@Data
@Component
@ConfigurationProperties(prefix = "application.message")
public class MessageConfig {
    /**
     * appid
     */
    private String appId;
    /**
     * appkey
     */
    private String appKey;
    /**
     * 注册模板
     */
    private String registerTemplate;
    /**
     * 作业提醒模板
     */
    private String homeworkTipTemplate;
}
application.yml
application:
  message:
    app-id: 1111
    app-key: 111
    register-template: 111
    homework-tip-template:111
创建组件
添加一个 httpclient 的 bean
    @Bean
    public HttpClient httpClient(){
        return HttpClients.createDefault();
    }
组件创建
/**
 * @author Echo
 * @version 1.0
 * @date 2019-02-22 01:17
 */
@Component
@Slf4j
public class SubMailUtils {

    private final HttpClient httpClient;
    private final MessageConfig messageConfig;
    private static final String X_SEND = "https://api.mysubmail.com/message/xsend";

    @Autowired
    public SubMailUtils(HttpClient httpClient, MessageConfig messageConfig) {
        this.httpClient = httpClient;
        this.messageConfig = messageConfig;
    }

    /**
     * 发送一条信息
     *
     * @param to   接收人
     * @param vars 模板变量
     */
    public boolean sendOneMessage(String to, String project, JSONObject vars) {
        HttpPost httpPost = new HttpPost(X_SEND);
        JSONObject jsonParam = new JSONObject();
        jsonParam.put("appid", messageConfig.getAppId());
        jsonParam.put("signature", messageConfig.getAppKey());
        jsonParam.put("project", project);
        jsonParam.put("to", to);
        jsonParam.put("vars", vars);
        StringEntity entity = new StringEntity(jsonParam.toJSONString(), "UTF-8");
        entity.setContentEncoding("UTF-8");
        entity.setContentType("application/json");
        httpPost.setEntity(entity);
        HttpResponse resp;
        try {
            resp = httpClient.execute(httpPost);
            HttpEntity he = resp.getEntity();
            log.info(EntityUtils.toString(he, "UTF-8"));
            return resp.getStatusLine().getStatusCode() == 200;
        } catch (IOException e) {
            e.printStackTrace();
            return false;
        }

    }
}
使用组件
我注册的时候需要发送一条短信,那么我应该在 controller 里面这样写
@GetMapping("/mobile/{phone}")
public HttpEntity<?> mobileCode(@PathVariable String phone) {
// 当前手机号是否已被注册
SysUser sysUser = new SysUser();
sysUser.setPhone(phone);
String result = sysUserService.existUser(sysUser);
if (result != null) {
throw new ResourceExistException(result);
}
// 生成 key 和 code
String key = MOBILE + phone;
String code = RandomStringUtils.randomNumeric(
applicationProperties.getValidate().getMobileCodeMinLength(),
applicationProperties.getValidate().getMobileCodeMaxLength());
// 存放
oauth2Service.saveValidateCode(key, code,
applicationProperties.getValidate().getMobileCodeValidityPeriod(),
TimeUnit.MINUTES);
// 创建模板变量
JSONObject vars = new JSONObject();
vars.put("code", code);
vars.put("time", applicationProperties.getValidate().getMobileCodeValidityPeriod());
// 发送短信
if (!subMailUtils.sendOneMessage(phone, messageConfig.getRegisterTemplate(), vars)) {
throw new RuntimeException("message send failed!");
}
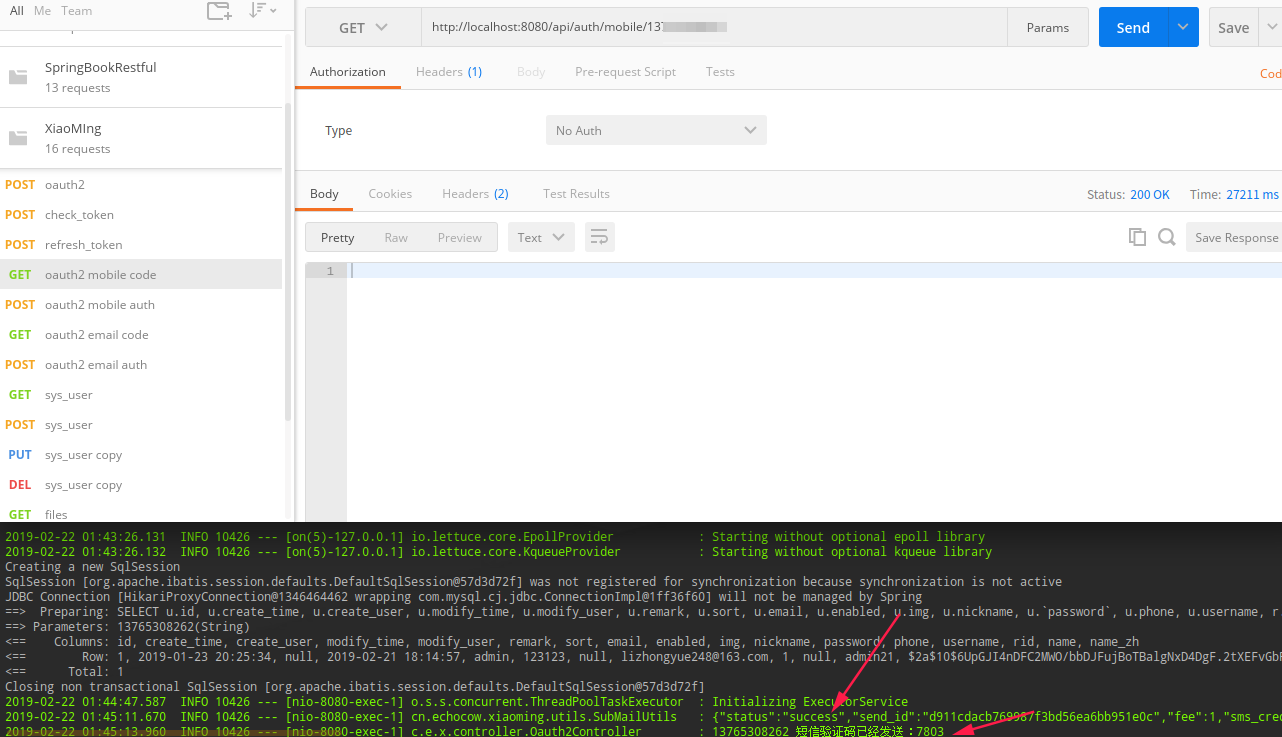
log.info("{} 短信验证码已经发送:{}", phone, code);
return ResponseEntity.ok().build();
}
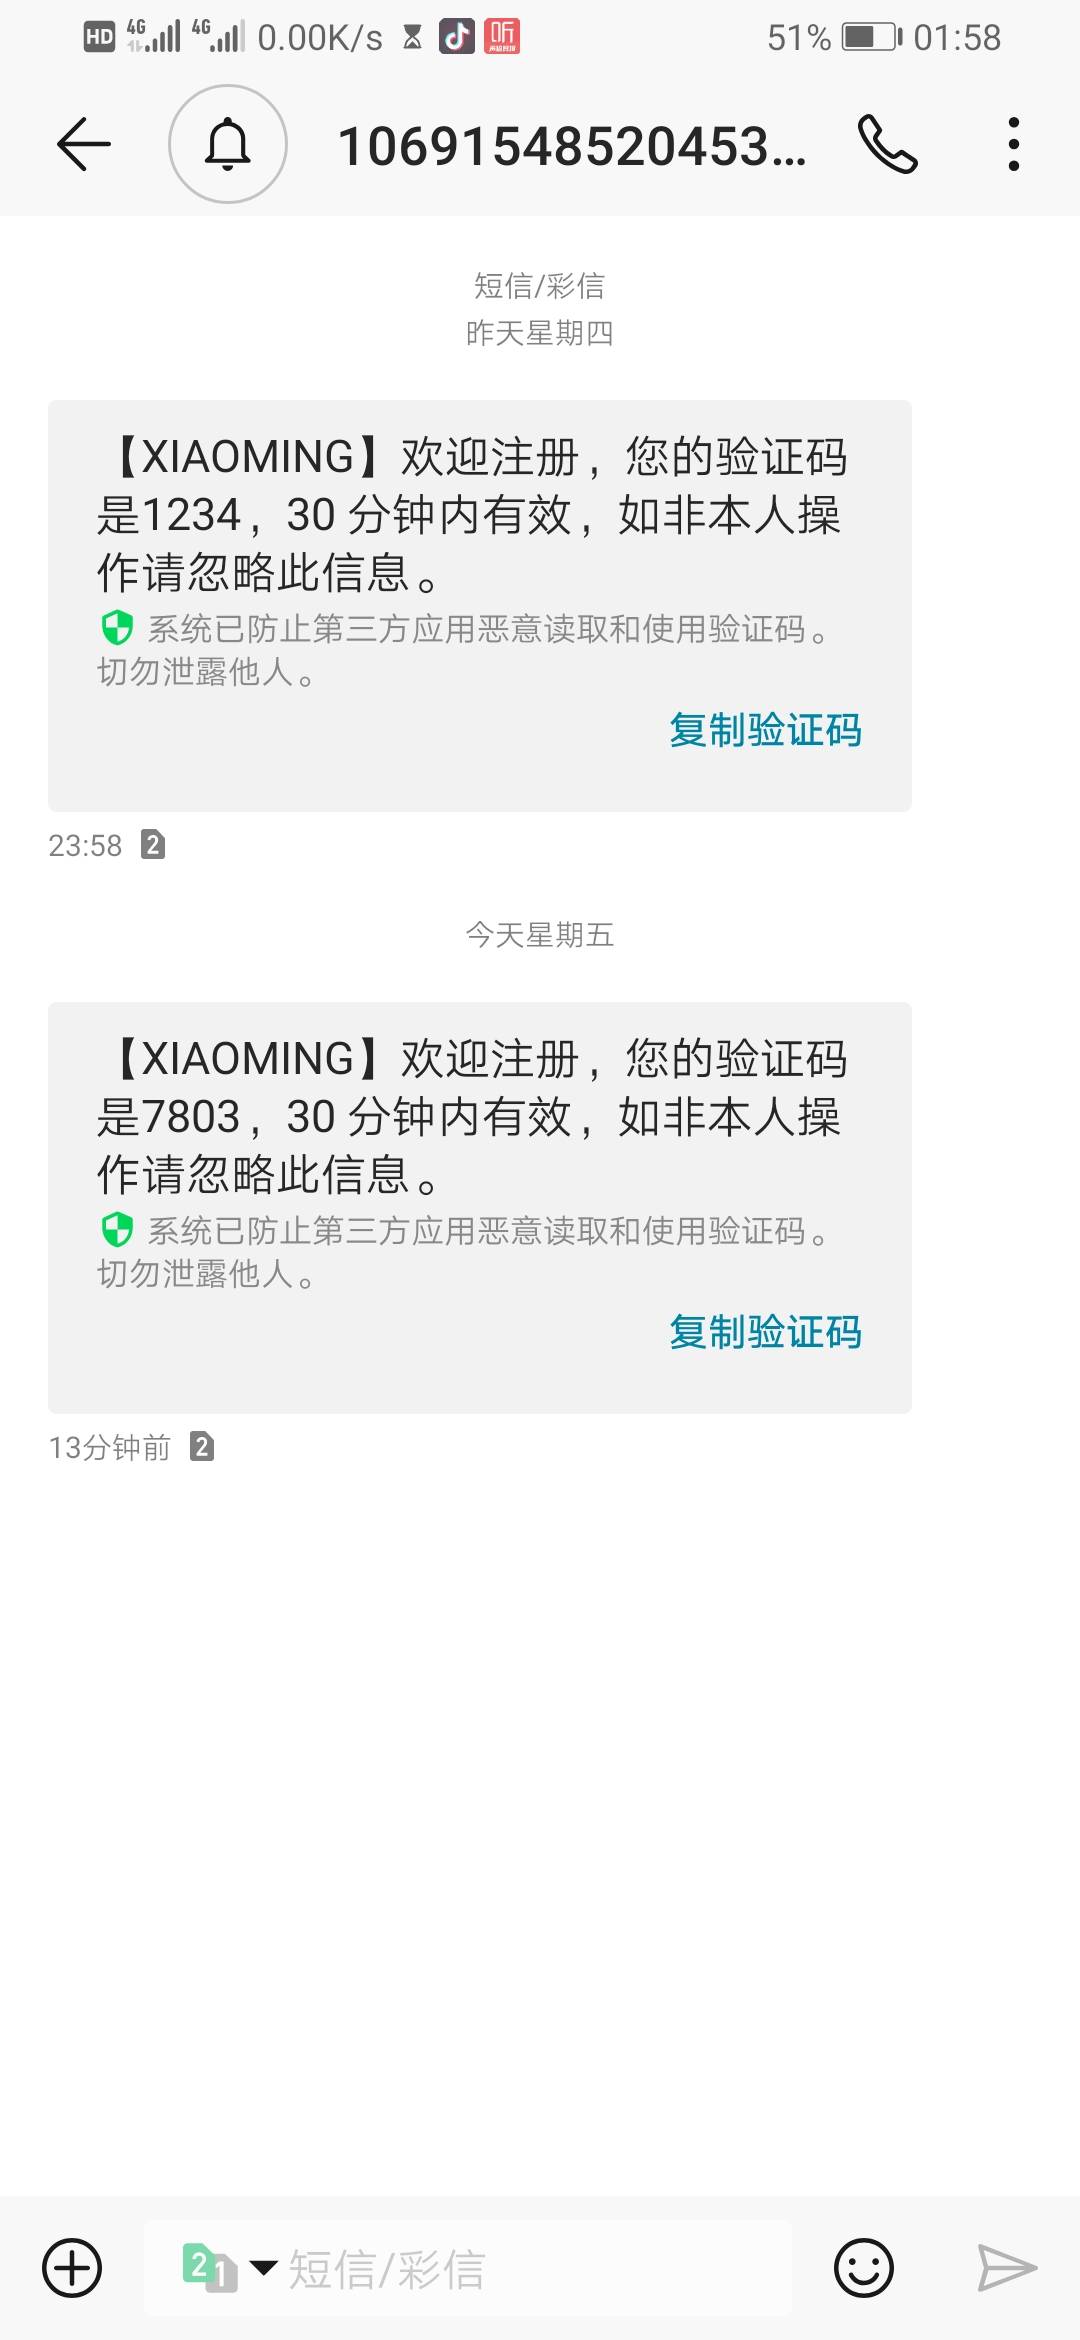
测试
请求验证码

发送多条短信
发送多条短信封装类似,不过多加一个异步`@Async`注解,再配置下异步线程池即可,就不再详述了,太困了。。。。
总结
到这里就算结束了,难度不大,但是很好玩儿,其实难点在于如何手动生成 oauth2 的 jwt 加密那里。。。其余地方都不是很难,后面写这个应用总结的时候再详述吧~短信接口感觉还是很贵的,学生党,玩玩儿就够啦哈哈。晚安啦